RabbitMQ란?
RabbitMQ는 AMQP(Advanced Message Queuing Protocol)를 구현한 오픈소스 메시지 브로커입니다.
Producer(생산자)가 보낸 메시지를 Queue에 저장한 뒤, Consumer(소비자)에게 전달해주는 비동기 메시징 시스템입니다.
AMQP와 함께 MQTT, STORMQ 등 여러 플러그인을 제공하여 다양한 프로토콜과의 결합도 가능하기 때문에 많이 사용합니다.
마이크로서비스, 이벤트 기반 시스템, 비동기 처리 등에서 널리 사용됩니다.
RabbitMQ 실습 환경 구성
실습에 사용되는 서버는 다음과 같습니다:
| 🐇 RabbitMQ Broker | 192.168.254.140 | Ubuntu 24.04 |
| 📤 Publisher (Producer) | 192.168.254.144 | Ubuntu 22.04 |
| 📥 Subscriber (Consumer) | 192.168.254.145 | Ubuntu 22.04 |
RabbitMQ는 192.168.254.140 서버에 설치되어 있으며, 각 클라이언트는 네트워크를 통해 메시지를 송수신합니다.
RabbitMQ 설치 및 기본 설정
RabbitMQ를 설치합니다.
sudo apt install rabbitmq-server
설치가 완료되면 서비스가 정상적으로 실행중인지 확인합니다.
lejus@rbmq-1:~$ sudo service rabbitmq-server status
● rabbitmq-server.service - RabbitMQ Messaging Server
     Loaded: loaded (/lib/systemd/system/rabbitmq-server.service; enabled; vendor preset: enabled)
     Active: active (running) since Wed 2025-04-23 17:27:13 KST; 16h ago
   Main PID: 93430 (beam.smp)
      Tasks: 276 (limit: 4519)
     Memory: 177.5M
        CPU: 9min 21.254s
     CGroup: /system.slice/rabbitmq-server.service
             ├─93430 /usr/lib/erlang/erts-12.2.1/bin/beam.smp -W w -MBas ageffcbf -MHas ageffcbf -MBlmbcs 512 -MHlmbcs 512 -MMmcs 30 -P 1048576 -t 5000000 ->
             ├─93442 erl_child_setup 65536
             ├─93996 inet_gethost 4
             ├─93997 inet_gethost 4
             └─94010 /bin/sh -s rabbit_disk_monitor

Apr 23 17:27:08 rbmq-1 systemd[1]: Starting RabbitMQ Messaging Server...
Apr 23 17:27:13 rbmq-1 systemd[1]: Started RabbitMQ Messaging Server.
lejus@rbmq-1:~$ ss -anltp
State         Recv-Q        Send-Q               Local Address:Port                  Peer Address:Port        Process
LISTEN        0             128                        0.0.0.0:25672                      0.0.0.0:*
LISTEN        0             1024                       0.0.0.0:15672                      0.0.0.0:*
LISTEN        0             128                        0.0.0.0:22                         0.0.0.0:*
LISTEN        0             4096                     127.0.0.1:40379                      0.0.0.0:*
LISTEN        0             4096                       0.0.0.0:31311                      0.0.0.0:*
LISTEN        0             4096                 127.0.0.53%lo:53                         0.0.0.0:*
LISTEN        0             128                              *:5672                             *:*
LISTEN        0             128                              *:1883                             *:*
LISTEN        0             4096                             *:4222                             *:*            users:(("nats-server",pid=69840,fd=3))
LISTEN        0             128                           [::]:22                            [::]:*
LISTEN        0             4096                             *:4369                             *:*
LISTEN        0             4096                          [::]:31311                         [::]:*
서비스 Active가 active (running) 이고, TCP 포트 5672가 LISTEN 상태면 됩니다.
다음으로 계정을 생성합니다.
기본적으로 guest/guest 계정이 있지만 localhost 에서만 로그인되므로 신규 계정을 생성합니다.
sudo rabbitmqctl add_user <계정명> <비밀번호>

lejus@rbmq-1:~$ sudo rabbitmqctl add_user myuser password
Adding user "myuser" ...
Done. Don't forget to grant the user permissions to some virtual hosts! See 'rabbitmqctl help set_permissions' to learn more.
lejus@rbmq-1:~$
다음으로 권한을 부여합니다.
lejus@rbmq-1:~$ sudo rabbitmqctl set_permissions myuser ".*" ".*" ".*"
Setting permissions for user "myuser" in vhost "/" ...
myuser 계정으로 모든 권한을 허용 한다는 의미입니다.
다음으로 tag 설정을 해줍니다.
GUI와 같은 관리를 위해서는 관리자로 지정해주어야 합니다.
lejus@rbmq-1:~$ sudo rabbitmqctl set_user_tags myuser administrator
Setting tags for user "myuser" to [administrator] ...
lejus@rbmq-1:~$ sudo rabbitmqctl list_users
Listing users ...
user    tags
guest   [administrator]
myuser  [administrator]
다음으로 GUI Plugin을 활성화 합니다.
기본적으로 GUI 환경을 제공합니다.
lejus@rbmq-1:~$ sudo rabbitmq-plugins enable rabbitmq_management
Enabling plugins on node rabbit@rbmq-1:
rabbitmq_management
The following plugins have been configured:
  rabbitmq_management
  rabbitmq_management_agent
  rabbitmq_mqtt
  rabbitmq_web_dispatch
Applying plugin configuration to rabbit@rbmq-1...
The following plugins have been enabled:
  rabbitmq_management
  rabbitmq_management_agent
  rabbitmq_web_dispatch

started 3 plugins.

lejus@rbmq-1:~$ ss -anltp
State                             Recv-Q                            Send-Q                                                       Local Address:Port                                                          Peer Address:Port                            Process
LISTEN                            0                                 128                                                                0.0.0.0:25672                                                              0.0.0.0:*
LISTEN                            0                                 1024                                                               0.0.0.0:15672                                                              0.0.0.0:*
LISTEN                            0                                 128                                                                0.0.0.0:22                                                                 0.0.0.0:*
LISTEN                            0                                 4096                                                             127.0.0.1:40379                                                              0.0.0.0:*
LISTEN                            0                                 4096                                                               0.0.0.0:31311                                                              0.0.0.0:*
LISTEN                            0                                 4096                                                         127.0.0.53%lo:53                                                                 0.0.0.0:*
LISTEN                            0                                 128                                                                      *:5672                                                                     *:*
LISTEN                            0                                 128                                                                      *:1883                                                                     *:*
LISTEN                            0                                 4096                                                                     *:4222                                                                     *:*                                users:(("nats-server",pid=69840,fd=3))
LISTEN                            0                                 128                                                                   [::]:22                                                                    [::]:*
LISTEN                            0                                 4096                                                                     *:4369                                                                     *:*
LISTEN                            0                                 4096                                                                  [::]:31311                                                                 [::]:*
TCP 15672 포트가 GUI 포트입니다. LISTEN 상태로 되어있는지 확인합니다.
여기까지 설정이 완료되면 GUI 접속을 시도합니다.
http://192.168.254.140:15672로 접속하면 아래와 같은 화면이 출력됩니다.

위에서 생성한 계정으로 로그인이 되는지 확인합니다.

AMQP를 활용한 통신 예제
간단하게 파이썬을 활용해서 두 클라이언트(Publisher, Subscriber)간의 메시지 전송 예제를 확인합니다.
Python으로 AMQP 통신을 진행하려면 pika 모듈을 설치해야 합니다.
python -m pip install pika
Publisher 코드
import pika

credentials = pika.PlainCredentials('myuser', 'password')
parameters = pika.ConnectionParameters('192.168.254.140', 5672, '/', credentials)
connection = pika.BlockingConnection(parameters)
channel = connection.channel()

channel.basic_publish(exchange='',
                      routing_key='hello',
                      body='Hello RabbitMQ with login!')
print(" [x] Sent message with login")
connection.close()
RabbitMQ 서버에서 생성한 계정과 서버 접속 정보를 가지고 연결을 시도하며, hello라는 Queue에 메시지를 전송합니다.
기본적으로 exchange는 Direct로 되어있으며 body 부분에 전달할 정보를 입력합니다.
routing_key는 Direct Exhange 안의 Queue가 Binding될 때 사용한 Key값을 의미합니다.
지금 예제에서는 hello가 됩니다.
Subscriber 코드
import pika

credentials = pika.PlainCredentials('myuser', 'password')
parameters = pika.ConnectionParameters('192.168.254.140', 5672, '/', credentials)
connection = pika.BlockingConnection(parameters)
channel = connection.channel()

channel.queue_declare(queue='hello')

def callback(ch, method, properties, body):
    print(f" [x] Received: {body.decode()}")

channel.basic_consume(queue='hello',
                      on_message_callback=callback,
                      auto_ack=True)

print(' [*] Waiting for messages...')
channel.start_consuming()
Publisher와 마찬가지로 접속을 진행하며 hello라는 Queue를 구독(수신 대기) 합니다.
이후 Queue에 메시지가 등록되면 Subscriber는 해당 메시지를 수신하여 on_message_callback에 의해 처리하도록 합니다.
Callback Method 형식은 다음과 같습니다.
def on_message_callback(ch, method, properties, body):| ch | 메시지를 소비하는 채널 객체입니다. 여기서 ack, nack, reject 등을 호출할 수 있습니다. |
| method | 메시지의 전달 정보 (delivery tag, exchange, routing key 등)를 담고 있는 객체입니다. |
| properties | 메시지 속성 (headers, content_type 등) 정보를 담은 객체입니다. |
| body | 큐에서 받은 메시지 본문 (payload) 입니다. 일반적으로 bytes 타입입니다. |
Subscriber를 실행한 후
(venv) lejus@subscriber:~$ vi consumer.py
(venv) lejus@subscriber:~$ python consumer.py
 [*] Waiting for messages...
GUI에서 Queues 탭을 확인하면

hello라는 Queue가 생성된 것을 확인할 수 있습니다.
그리고 Connections 탭에 이동하면
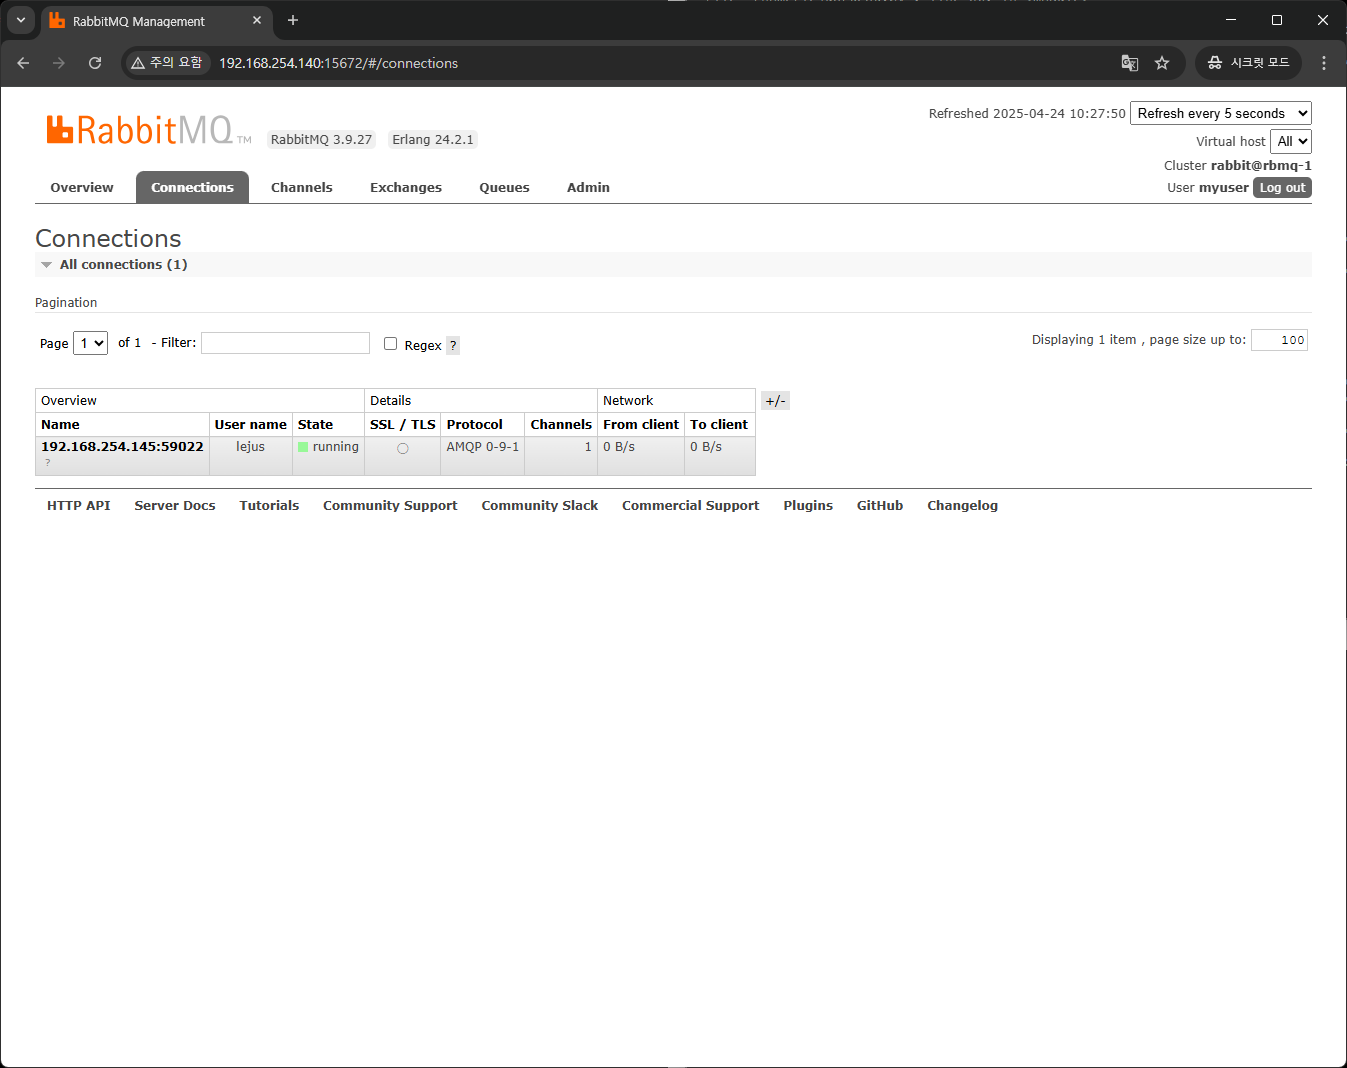
현재 연결 중인 호스트에 대한 정보를 확인할 수 있습니다.
그리고 Exchanges 탭으로 이동하면
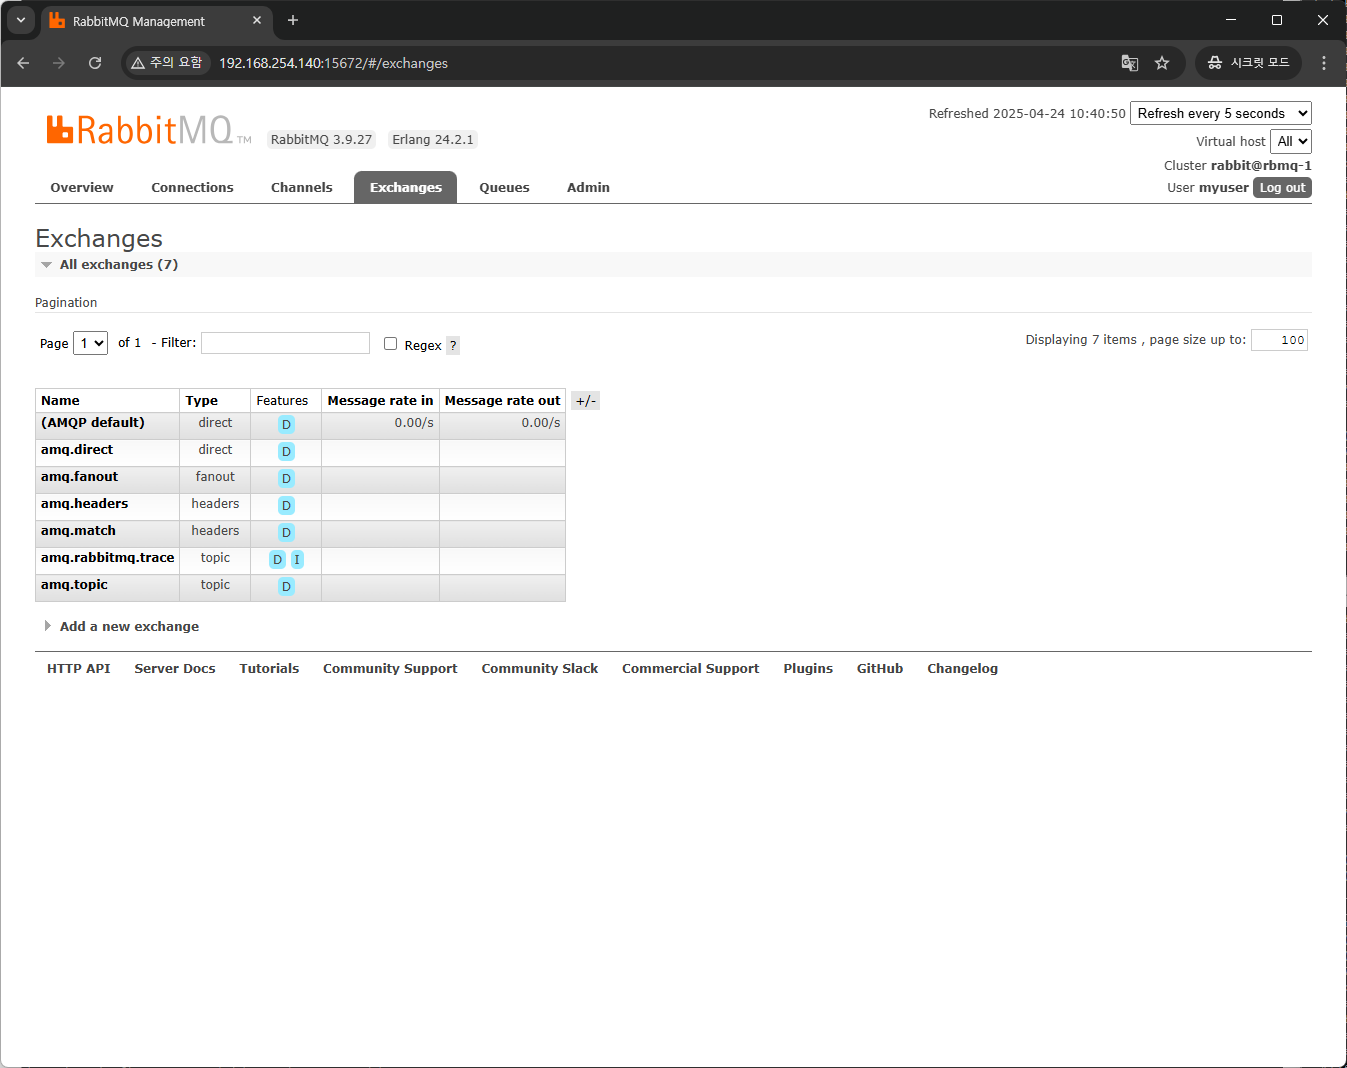
(AMQP default) Name 옆에 Message rate in과 Message rate out에 값이 0.00/s 라는 값으로 확인되는데 아까 Python 코드에서 exchange가 빈 값이면 기본적으로 direct exchange를 사용한다고 했기 때문에 Type이 direct 기본 값이 선택됩니다.
그리고 Publisher 코드를 실행하면
(venv) lejus@publisher:~$ python publisher.py
 [x] Sent message with login
RabbitMQ 서버의 로그 파일에 다음과 같은 로그가 확인 됩니다.
lejus@rbmq-1:~$ sudo tail /var/log/rabbitmq/rabbit@rbmq-1.log
2025-04-24 10:28:28.908034+09:00 [info] <0.28624.0> accepting AMQP connection <0.28624.0> (192.168.254.144:60346 -> 192.168.254.140:5672)
2025-04-24 10:28:28.911648+09:00 [info] <0.28624.0> connection <0.28624.0> (192.168.254.144:60346 -> 192.168.254.140:5672): user 'myuser' authenticated and granted access to vhost '/'
2025-04-24 10:28:28.917865+09:00 [info] <0.28624.0> closing AMQP connection <0.28624.0> (192.168.254.144:60346 -> 192.168.254.140:5672, vhost: '/', user: 'myuser')
그리고 GUI의 Queues탭에서 hello Queue를 선택하면

이처럼 hello Queue에 메시지가 publish된 것을 확인할 수 있으며 그래프로 확인도 가능합니다.
이후 Subscriber를 확인하면
(venv) lejus@subscriber:~$ python consumer.py
 [*] Waiting for messages...
 [x] Received: Hello RabbitMQ with login!
정상적으로 메시지를 수신한 것을 확인할 수 있습니다.
이후 Subscriber의 코드를 중단하고 Publisher 코드를 여러 실행합니다.
(venv) lejus@subscriber:~$ python consumer.py
 [*] Waiting for messages...
 [x] Received: Hello RabbitMQ with login!
^CTraceback (most recent call last):
  File "/home/lejus/consumer.py", line 18, in <module>
    channel.start_consuming()
  File "/home/lejus/venv/lib/python3.10/site-packages/pika/adapters/blocking_connection.py", line 1883, in start_consuming
    self._process_data_events(time_limit=None)
  File "/home/lejus/venv/lib/python3.10/site-packages/pika/adapters/blocking_connection.py", line 2044, in _process_data_events
    self.connection.process_data_events(time_limit=time_limit)
  File "/home/lejus/venv/lib/python3.10/site-packages/pika/adapters/blocking_connection.py", line 842, in process_data_events
    self._flush_output(common_terminator)
  File "/home/lejus/venv/lib/python3.10/site-packages/pika/adapters/blocking_connection.py", line 514, in _flush_output
    self._impl.ioloop.poll()
  File "/home/lejus/venv/lib/python3.10/site-packages/pika/adapters/select_connection.py", line 579, in poll
    self._poller.poll()
  File "/home/lejus/venv/lib/python3.10/site-packages/pika/adapters/select_connection.py", line 1184, in poll
    events = self._poll.poll(self._get_max_wait())
KeyboardInterrupt
(venv) lejus@publisher:~$ python publisher.py
 [x] Sent message with login
(venv) lejus@publisher:~$ python publisher.py
 [x] Sent message with login
(venv) lejus@publisher:~$ python publisher.py
 [x] Sent message with login
(venv) lejus@publisher:~$ python publisher.py
 [x] Sent message with login
(venv) lejus@publisher:~$ python publisher.py
 [x] Sent message with login
(venv) lejus@publisher:~$ python publisher.py
 [x] Sent message with login
그리고 GUI의 Queues 탭에 hello Queue를 확인하면

Details 부분에 Messages Ready와 In memory가 6으로 되어있는 것을 확인할 수 있습니다.
Queue에 저장된 메시지가 구독자에 의해 처리되어야 하는데 연결이 끊겨 아직 Queue에 쌓여 있는 것입니다.
이제 Subscriber를 실행하면
(venv) lejus@subscriber:~$ python consumer.py
 [*] Waiting for messages...
 [x] Received: Hello RabbitMQ with login!
 [x] Received: Hello RabbitMQ with login!
 [x] Received: Hello RabbitMQ with login!
 [x] Received: Hello RabbitMQ with login!
 [x] Received: Hello RabbitMQ with login!
 [x] Received: Hello RabbitMQ with login!
Queue에 쌓여 있던 메시지가 모두 수신되는 것을 확인할 수 있습니다.
마무리
이번 AMQP예제를 통해서 어떻게 메시지가 처리되는지에 대해 알 수 있었습니다.
'Study' 카테고리의 다른 글
| [MQ] 에 대해서 (0) | 2025.04.24 |
|---|---|
| [Rack Tables] 설치 (5) | 2024.12.24 |